
Categorical Time Series are the predominant form of metadata in events. This data content is highly simplified, consisting of just labeled time intervals, which makes it easy to edit. The primary metadata sequences of this type include:
Display
The display of a Categorical Time Series shows labeled segments with boundaries; for example:


The commonly seen caret symbol ^ indicates an absence, such as a pause.
When a Categorical Time Series is currently selected, the Sequence section of the Inspector shows this information:
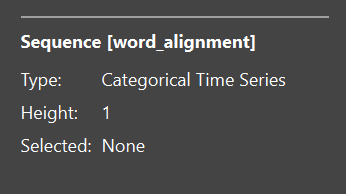
The properties include:
-
the height, which is the number of tiers
-
the label of the currently selected segment, if any
Boundary and segment selection
Selection in a Categorical Time Series is useful for editing. You can select both boundaries and segments, as shown in the video below:
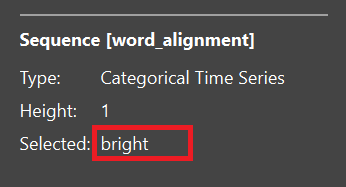
When a segment is selected, the arrow keys on the keyboard may be used to move the selection to adjacent segments. The left and right arrow keys move the selection to the preceding or following segments on the same tier; the up and down keys move the selection between tiers (if there is more than one tier). This is illustrated below.
When a segment is selected, its label is shown in the Inspector:
Moving boundaries
In order to move a boundary:
-
Select the boundary. The selected boundary is now red.
-
Hover over the selected boundary. The cursor will change to a two-sided arrow.

-
Click and drag the boundary left or right.
Inserting boundaries
A Categorical Time Series boundary may be inserted at a boundary of the current time selection. These are the steps:
-
Select an interval or time point on the timeline (see Time selection).
-
Within the Categorical Time Series, hover over the boundary of the time selection. The hovered portion will turn green.
-
Double-click the hovered portion to create the boundary.
Inserting a boundary inside a segment divides it into two segments, each with the same label as the original. This is typically followed by relabeling one of the segments. The video below shows boundary insertions in action.
Deleting boundaries
To delete a boundary:
-
Select the boundary. The selected boundary is now red.
-
Press the delete key on your keyboard.
When a boundary between two segments is deleted, the two segments are merged into one, and take the label of the right segment.
Deleting segments
To delete a segment:
-
Select the segment.
-
Press the delete key on your keyboard.
When a segment is deleted, it is merged into the segment to its right.
Relabeling segments
Segment labels may be changed using the Inspector. Following are the steps:
-
Select the segment.
-
In the Inspector Sequence properties, you will find the label of the currently selected segment on a button. Click the button to select a new label from a list.
For behavior mode and expressions, the label lists are populated with options from the currently selected Character Control File (see Resources). In the example below, a behavior mode segment is selected, and the list of options is populated with all the behavior modes of the current character.
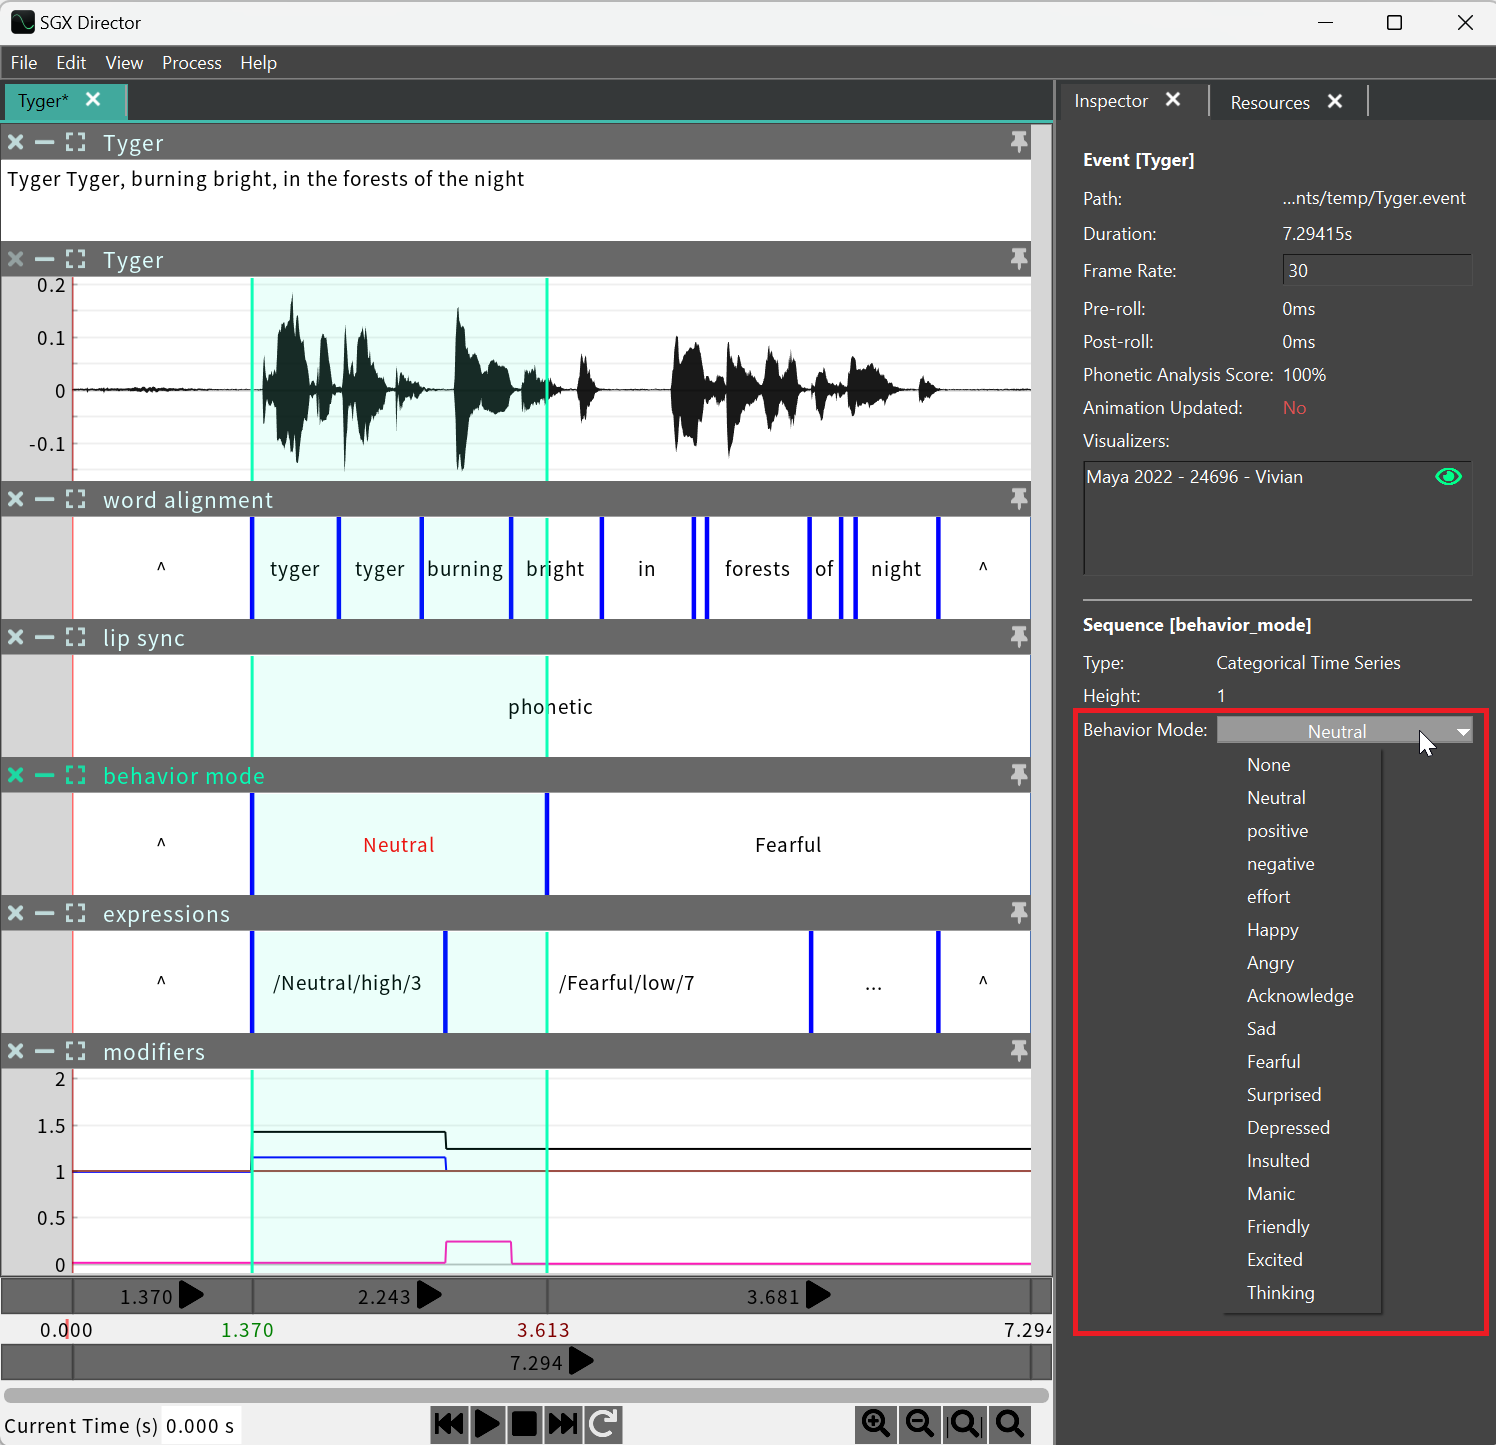
While editing behavior modes and expressions, make sure that the currently selected character is the one for which the event is intended, so that the label menus are populated with the right options.
Relabeling expression segments
The Expressions sequence provides special functionality for efficient editing of expressions. If the event is bound to a running instance of SGX Studio (see Playing Events on how to bind events to SGX Studio for visualization), then whenever an expression is selected in the event, the corresponding expression pose is displayed on the character.
The video below demonstrates – using an event bound to SGX Studio in Unreal Engine – how to preview expressions in the event, preview potential replacements, and choose the replacement.
Editing alignment
In the specific cases of word alignment and phone alignment, note that editing has some restrictions: insertions, deletions, and label changes are generally not allowed; only moving of boundaries is permitted. This protects adherence of these analyses to the transcript.
However, in the word alignment, it is possible to insert and delete pause segments. To insert a pause, select a word segment, and in the menu, select either of the following:
-
Edit > Insert Pause Before Word
-
Edit > Insert Pause After Word